Note
Click here to download the full example code
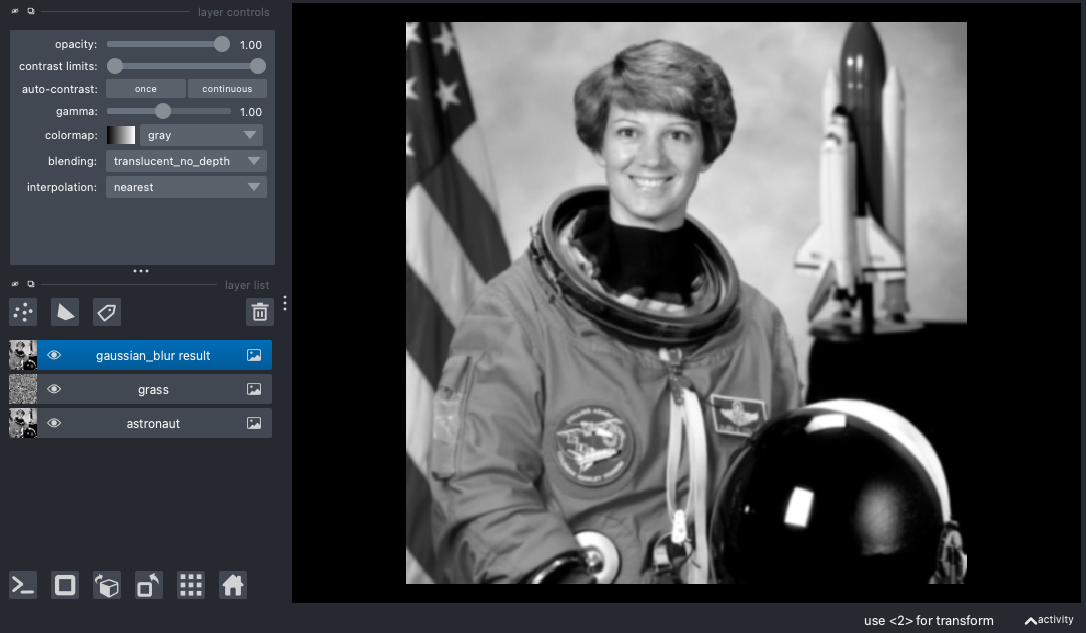
napari parameter sweeps#
napari is a fast, interactive,
multi-dimensional image viewer for python. It uses Qt for the GUI, so it's easy
to extend napari with small, composable widgets created with magicgui. Here,
we demonstrate how to build a interactive widget that lets you immediately see
the effect of changing one of the parameters of your function.
For napari-specific magicgui documentation, see the napari docs
See also: Some of this tutorial overlaps with topics covered in the napari image arithmetic example.
outline#
This example demonstrates how to:
-
Create a
magicguiwidget that can be used in another program (napari) -
Automatically call our function when a parameter changes
-
Provide
magicguiwith a custom widget for a specific argument -
Use the
choicesoption to create a dropdown -
Connect some event listeners to create interactivity.
code#
Code follows, with explanation below... You can also get this example at github.
1 2 3 4 5 6 7 8 9 10 11 12 13 14 15 16 17 18 19 20 21 22 23 24 25 26 27 28 29 30 31 32 33 34 35 36 | |
walkthrough#
We're going to go a little out of order so that the other code makes more sense. Let's start with the actual function we'd like to write to apply a gaussian filter to an image.
the function#
Our function is a very thin wrapper around
skimage.filters.gaussian.
It takes a napari Image
layer, a sigma to control
the blur radius, and a mode that determines how edges are handled.
def gaussian_blur(layer: Image, sigma: float = 1, mode="nearest") -> Image:
return filters.gaussian(layer.data, sigma=sigma, mode=mode)
The reasons we are wrapping it here are:
filters.gaussianaccepts anumpyarray, but we want to work withnaparilayers that store the data in alayer.dataattribute. So we need an adapter.- We'd like to add some type annotations to the
signature that were not provided by
filters.gaussian
type annotations#
As described in the image arithmetic example, we take
advantage of napari's built in support for magicgui by annotating our function
parameters and return value as napari Layer types. napari will then tell
magicgui what to do with them, creating a dropdown with a list of current
layers for our layer parameter, and automatically adding the result of our
function to the viewer when called.
For documentation on napari types with magicgui, see the napari docs
the magic part#
Finally, we decorate the function with @magicgui and provide some options.
@magicgui(
auto_call=True,
sigma={"widget_type": "FloatSlider", "max": 6},
mode={"choices": ["reflect", "constant", "nearest", "mirror", "wrap"]},
)
def gaussian_blur(layer: ImageData, sigma: float = 1.0, mode="nearest") -> ImageData:
# Apply a gaussian blur to ``layer``.
if layer is not None:
return skimage.filters.gaussian(layer, sigma=sigma, mode=mode)
auto_call=Truemakes it so that thegaussian_blurfunction will be called whenever one of the parameters changes (with the current parameters set in the GUI).-
We then provide keyword arguments to modify the look & behavior of
sigmaandmode:"widget_type": "FloatSlider"tellsmagicguinot to use the standard (float) widget for thesigmawidget, but rather to use a slider widget.- we then set an upper limit on the slider values for
sigma.
-
finally, we specify valid
choicesfor themodeargument. This turns that parameter into a categorical/dropdown type widget, and sets the options.
connecting events#
As described in the Events documentation, we can
also connect any callback to the gaussian_blur.called signal that will receive
the result of our decorated function anytime it is called.
def do_something_with_result(result): ...
gaussian_blur.called.connect(do_something_with_result)
Code#
Here's the full code example again.
import napari
import skimage.data
import skimage.filters
from napari.types import ImageData

from magicgui import magicgui


# turn the gaussian blur function into a magicgui
# - 'auto_call' tells magicgui to call the function when a parameter changes
# - we use 'widget_type' to override the default "float" widget on sigma,
#   and provide a maximum valid value.
# - we constrain the possible choices for 'mode'
@magicgui(
    auto_call=True,
    sigma={"widget_type": "FloatSlider", "max": 6},
    mode={"choices": ["reflect", "constant", "nearest", "mirror", "wrap"]},
    layout="horizontal",
)
def gaussian_blur(layer: ImageData, sigma: float = 1.0, mode="nearest") -> ImageData:
    # Apply a gaussian blur to 'layer'.
    if layer is not None:
        return skimage.filters.gaussian(layer, sigma=sigma, mode=mode)


# create a viewer and add some images
viewer = napari.Viewer()
viewer.add_image(skimage.data.astronaut().mean(-1), name="astronaut")
viewer.add_image(skimage.data.grass().astype("float"), name="grass")

# Add it to the napari viewer
viewer.window.add_dock_widget(gaussian_blur)
# update the layer dropdown menu when the layer list changes
viewer.layers.events.changed.connect(gaussian_blur.reset_choices)

napari.run()
Total running time of the script: ( 0 minutes 1.726 seconds)
Download Python source code: napari_parameter_sweep.py